Tutorial
The goal of this step-by-step tutorial is to introduce you to non-relational schema design and the tools Django MongoDB Engine provides to put that design into action.
This tutorial assumes that you are already familiar with Django and have a basic idea of MongoDB operation and a configured MongoDB installation.
Our example project covers the development of a simple single-user blog application with tag and comment capabilities.
Note
When you try out the shell examples given in this tutorial (which you should!) it is important to remember that model changes will have no effect until you restart the shell.
Non-Relational Schema Design
If you come from a relational background a non-relational database may seem counter-intuitive or completely odd since most non-relational databases are document and multi-key oriented and provide a different method of querying and excluding data.
Perhaps a good way to get used to non-relational style data modeling is to ask yourself “What would I never do in SQL”.
Because most relational databases lack proper list data structures you may typically model the Posts ⇔ Tags ⇔ Comments relationship using three models/tables, one table per entity type.
Organizing your data using multiple relationships is the exact opposite of what we will do for our non-relational data model: Have one single collection (table) for everything and store tags and comments in simple lists.
Here is a simple model for blog posts, designed for non-relational databases:
from django.db import models

from djangotoolbox.fields import ListField


class Post(models.Model):
    title = models.CharField()
    text = models.TextField()
    tags = ListField()
    comments = ListField()
Let’s try this out. Fire up a Django shell and add a post:
>>> from nonrelblog.models import Post
>>> post = Post.objects.create(
...     title='Hello MongoDB!',
...     text='Just wanted to drop a note from Django. Cya!',
...     tags=['mongodb', 'django']
... )

Surely we want to add some comments.

>>> post.comments
[]
>>> post.comments.extend(['Great post!', 'Please, do more of these!'])
>>> post.save()

Look and see, it has actually been saved!

>>> Post.objects.get().comments
[u'Great post!', u'Please, do more of these!']
In the MongoDB shell, you can see how the resulting data record looks like:
{
  "_id" : ObjectId("..."),
  "tags" : ["mongodb", "django"],
  "text" : "Just wanted to drop a note from Django. Cya!",
  "title" : "Hello MongoDB!",
  "comments" : [
    "Great post!",
    "Please, do more of these!"
  ]
}
You may have noticed something’s missing from the Post class:
We have no information about the date and time our posts are created!
Fixed easily.
Migration-Free Model Changes
Happily, because MongoDB is schema-less, we can add new fields to our model without corrupting existing data records (“documents”). Forget about migrations!
So, adding a new field boils down to... adding a new field.
class Post(models.Model):
    created_on = models.DateTimeField(auto_now_add=True, null=True) # <---
    title = models.CharField(max_length=255)
    text = models.TextField()
    tags = ListField()
    comments = ListField()
One thing to keep in mind is what happens to our old posts: Because they miss
a created_on value, when fetching them in Django, the created_on
attribute will be set to the DateTimeField default
value, None. To allow None as value, we have to pass null=True.
We can use database records even though they were created
with an older version of or model schema:

>>> from nonrelblog.models import Post
>>> old_post = Post.objects.all()[0]
>>> old_post.created_on is None
True
>>> new_post = Post.objects.create()
>>> new_post.created_on is None
False
There’s another flaw in our design: We can’t store any comment meta information like author name/email and creation time. We’ll tackle that in the next section.
Embedded Models
So far, we used to store comments as a list of strings. We’ll have to rework that design in order to store additional information for each comment.
Let’s first design our model for comments.
class Comment(models.Model):
    created_on = models.DateTimeField(auto_now_add=True)
    author_name = models.CharField(max_length=255)
    author_email = models.EmailField()
    text = models.TextField()
The BSON representation of this model looks like this:
{
  'created_on': ISODate('...'),
  'author_name': 'Bob',
  'author_email': 'bob@example.org',
  'text': 'The cake is a lie'
}
MongoDB allows to have objects within objects – called “subobjects” or “embedded objects” – so we could also represent this as follows:
{
  'created_on': ISODate('...'),
  'author' : {
    'name': 'Bob',
    'email': 'bob@example.org'
  },
  'text' : 'The cake is a lie'
}
Django itself does not allow such nesting – because there’s no such thing in SQL – but Django MongoDB Engine provides the tools to do anyway.
To embed instances of models into other models, we can use EmbeddedModelField:
from djangotoolbox.fields import EmbeddedModelField
    tags = ListField()
    comments = ListField(EmbeddedModelField('Comment')) # <---


class Comment(models.Model):
    created_on = models.DateTimeField(auto_now_add=True)
    author = EmbeddedModelField('Author')
    text = models.TextField()


class Author(models.Model):
    name = models.CharField()
Let’s hop into the Django shell and test this:
>>> from nonrelblog.models import Comment, Author
>>> Comment(
...     author=Author(name='Bob', email='bob@example.org'),
...     text='The cake is a lie'
... ).save()
>>> comment = Comment.objects.get()
>>> comment.author
<Author: Bob (bob@example.org)>
In the same way, we can embed Comment objects into the comments list
of a blog post, by
combining ListField and EmbeddedModelField:
class Post(models.Model):
    created_on = models.DateTimeField(auto_now_add=True, null=True)
    title = models.CharField()
    text = models.TextField()
    tags = ListField()
    comments = ListField(EmbeddedModelField('Comment')) # <---
We should mess around with our new Post model at this point.
>>> Post(
...     title='I like cake',
...     comments=[comment]
... ).save()
>>> post = Post.objects.get(title='I like cake')
>>> post.comments
[<Comment: Comment object>]
>>> post.comments[0].author.email
u'bob@example.org'
Here’s how this post is represented in MongoDB:
{
  "_id" : ObjectId("..."),
  "tags" : [ ],
  "text" : "",
  "title" : "I like cake",
  "comments" : [
    {
      "text" : "The cake is a lie",
      "created_on" : ISODate("..."),
      "id" : null,
      "author" : {
        "email" : "bob@example.org",
        "name" : "Bob",
        "id" : null
      }
    }
  ],
  "created_on" : ISODate("...")
}
Neat, isn’t it?
Using lists, dictionaries and embedded objects, you can design your database schema very similar to the structure of the Python objects used all over your code. No need to squeeze your objects into primitive non-relational schemas.
Adding Some Templates
To make our app actually useful, it’s time to add some views. Here’s how your post overview page could look like:
<h1>Post Overview</h1>
{% for post in post_list %}
  <h2><a href="{% url post_detail post.id %}">{{ post.title }}</a></h2>
  <p>
    {{ post.created_on }} |
    {{ post.comments|length }} comments |
    tagged {{ post.tags|join:', ' }}
  </p>
{% endfor %}
Pretty straightforward. Here’s the single post template:
<h1>{{ post.title }}</h1>
<p>{{ post.created_on }}</p>
<p>{{ post.text }}<p>
<h2>Comments</h2>
{% for comment in post.comments %}
  <h3>{{ comment.author.name }} <small>on {{ comment.created_on }}</small></h3>
  {{ comment.text }}
{% endfor %}
By using Django’s Generic Views, we even don’t have to write any views, so all that’s left is mapping URLs to those templates:
from django.conf.urls.defaults import patterns, url
from django.views.generic import ListView, DetailView

from models import Post


post_detail = DetailView.as_view(model=Post)
post_list = ListView.as_view(model=Post)

urlpatterns = patterns('',
    url(r'^post/(?P<pk>[a-z\d]+)/$', post_detail, name='post_detail'),
    url(r'^$', post_list, name='post_list'),
)
A fully working example project can be found in docs/source/code/tutorial/v3/.
Uploading Files to GridFS
To make our blog less boring, we should add some nice pictures.
As MongoDB disciples, what comes to mind when thinking about storing files? Of course! GridFS!
Django MongoDB Engine provides a Django storage backend for GridFS that allows you to use GridFS like any other file storage:
from django_mongodb_engine.storage import GridFSStorage


gridfs_storage = GridFSStorage()
from django.db import models

from gridfsuploads import gridfs_storage


class FileUpload(models.Model):
    created_on = models.DateTimeField(auto_now_add=True)
    file = models.FileField(storage=gridfs_storage, upload_to='/')
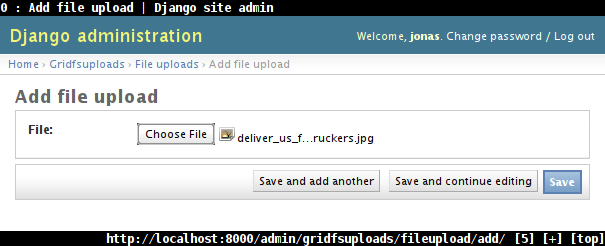
We can now use the Django admin to upload files to GridFS.
Next step is to write a serve view:
from mimetypes import guess_type

from django.conf import settings
from django.http import HttpResponse, Http404

from gridfs.errors import NoFile
from gridfsuploads import gridfs_storage
from gridfsuploads.models import FileUpload


if settings.DEBUG:

    def serve_from_gridfs(request, path):
        # Serving GridFS files through Django is inefficient and
        # insecure. NEVER USE IN PRODUCTION!
        try:
            gridfile = gridfs_storage.open(path)
        except NoFile:
            raise Http404
        else:
            return HttpResponse(gridfile, mimetype=guess_type(path)[0])
Warning
Serving files through such a view is inefficient and insecure. Never use this in production! There are much superior tools for serving files out of GridFS, e.g. nginx-gridfs.
We can now upload files via the admin...
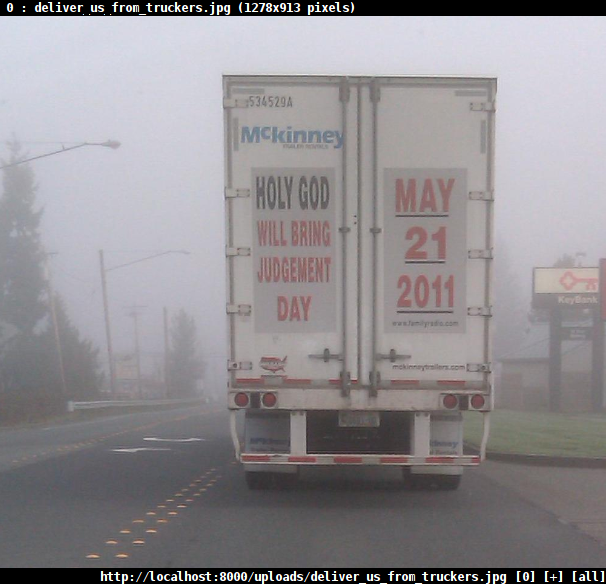
... and retrieve them under /uploads/:
As always, the full project source can be found in docs/source/code/tutorial/v4/.
Using Map/Reduce
Our last quest is to count the number of comments each author has made.
This could be done in plain Django but would be very inefficient because we would have to literally fetch all posts (with all comments) from the database.
Instead, we’re going to use Map/Reduce to accomplish the task.
Programmer’s introduction to Map/Reduce: The map function gets called for each document and emits one or more key-value pairs. The reduce function is passed a key and a list of values and reduces them to a single resulting value. The result of such a Map/Reduce operation is a list of key-value pairs, the keys being those emitted by the map function and the values those resulting from the reduce function.
Our map function emits a (author, 1) pair for each comment.
function map() {
  /* `this` refers to the current document */
  this.comments.forEach(function(comment) {
    emit(comment.author.name, 1);
  });
}
The reduce function sums up all the ones emitted by the map function.
function reduce(id, values) {
  /* [1, 1, ..., 1].length is the same as sum([1, 1, ..., 1]) */
  return values.length;
}
Map/Reduce support is added to Django’s ORM using a custom
Manager which is installed to the Post model
as follows:
from django_mongodb_engine.contrib import MongoDBManager
...
class Post(models.Model):
   ...
   objects = MongoDBManager()
Ready to Map/Reduce?
>>> from nonrelblog.models import *

Add some data so we can actually mapreduce anything.
Bob:   3 comments
Ann:   6 comments
Alice: 9 comments
>>> authors = [Author(name='Bob', email='bob@example.org'),
...            Author(name='Ann', email='ann@example.org'),
...            Author(name='Alice', email='alice@example.org')]
>>> for distribution in [(0, 1, 2), (1, 2, 3), (2, 3, 4)]:
...     comments = []
...     for author, ncomments in zip(authors, distribution):
...         comments.extend([Comment(author=author)
...                         for i in xrange(ncomments)])
...     Post(comments=comments).save()

------------------------
Kick off the Map/Reduce:
------------------------
>>> pairs = Post.objects.map_reduce(mapfunc, reducefunc, out='temp',
...                                 delete_collection=True)
>>> for pair in pairs:
...     print pair.key, pair.value
Alice 9.0
Ann 6.0
Bob 3.0
This is worth a review.
MongoDBManager.map_reduce()returns an iterator yieldingMapReduceResultobjects.- The third argument to
map_reduce()is the name of the collection where the Map/Reduce results should go to. - The fourth argument, delete_collection, tells Django MongoDB Engine to delete the temporary collection passed as third argument after the Map/Reduce result iterator is exhausted.
- The resulting counts are floats because Javascript does not distinguish between integers and floating point numbers.
Lastly, a quick word of warning. Map/Reduce is designed to be used for one-time operations – although it performs very well, it’s definitely not something you would want to execute on a per-request basis. Don’t use Map/Reduce in “hot” parts of your code.
Where to go from here
This tutorial should’ve given you an idea about how easy it is to combine Django and MongoDB using Django MongoDB Engine to produce simple, scalable applications.
Hopefully you’ve learned something useful for your next Django project that you should begin hacking on now. Go build something cool, and let us know about it!
You can always come back to this documentation as you need to learn new tricks:
- Our topical guides explain every feature of Django MongoDB Engine in great detail – they’ll provide you with usage guides, API overviews, code samples etc.
- The API reference has all the lower-level details on functions, methods, classes, settings, modules and whatnot.
- In the Meta section, we collect information about the project itself: What has changed between versions, how development happens and how you can get involved.
If you need support, don’t hesitate to write to our mailing list.
Also, we’d love to see you getting involved in Django MongoDB Engine’s development!
- Fix the documentation. None of the Django MongoDB Engine developers are native English speakers, so this docs are probably full of typos and weird, ungrammatical or incomprehensible phrasings. Every typo is worth reporting!
- Extend and improve the documentation. We appreciate any contribution!
- Blog/write about Django MongoDB Engine, and send us a link to your work.
- Report bugs and feature requests.
- Finally, send pull requests or patches containing bug fixes, new features and code improvements.